You've remembered the birthday, written a thoughtful message, and found the perfect photo. Then you look at the calendar and realize the occasion is close enough that a small mistake could turn a card into a late apology. How to send a card in the mail is less about dropping an envelope in a box and more about managing a short project: create the card, verify the address, choose the right postage, approve the final version, and hand it to USPS with enough time left.
Table of Contents
- Why Sending a Card Takes More Thought Than It Looks
- Deciding What to Say and Show Inside the Card
- Getting the Envelope and Address Right
- Choosing and Placing the Right Postage
- Working Backward to a Realistic Send-By Date
- Mailing It Yourself or Letting a Service Handle It
- A Simple Send Checklist You Can Reuse
Why Sending a Card Takes More Thought Than It Looks
The classic failure happens in the final hour: you write “Happy birthday,” slide the card into an envelope, copy an old address from your phone, and assume a stamp will cover everything. The card still depends on four separate details: the message inside, the address outside, the postage, and the timing of the postal handoff.
Any one of those details can stop the plan. A typo may appear only after you seal the envelope. The recipient may have moved, or the apartment number may be missing. A thick card with an insert can require more postage than a standard envelope. An online approval also does not mean the card is traveling. You or a fulfillment provider still has to print it, prepare it, and hand it to the postal network.
Practical rule: Treat the card as a deadline-driven task, not one action.
For a card you mail yourself, set up the pieces in order. Prepare the finished card, address the envelope, confirm the postage fits the envelope, and choose a handoff point such as a residential mailbox, blue collection box, or Post Office. USPS guidance for ordinary letters places the recipient's name first, the street address second, and the city, state, and ZIP Code on the final line, as outlined in USPS guidance for sending letters.
A preview-and-approval service changes who handles each step. You select the artwork and wording, check the recipient and total, approve the design, and let a fulfillment partner print, address, and hand off the card. That removes errands, but it adds a firm checkpoint. Review every name, address, message, and preview before approval. Once the wrong version is approved, convenience cannot fix it.
Deciding What to Say and Show Inside the Card
Start with the message, not the artwork. Decide what you want the recipient to feel, then choose an image that supports that feeling. A birthday card can be playful, a sympathy card should be restrained, and a congratulations card needs enough warmth to sound personal rather than like a generic announcement.
Use a rough draft before you touch the final design. Write the plain idea first, such as “congrats on the new house.” Then make it specific: mention the move, celebrate the work involved, and add a closing that sounds like you. A finished version might say that you're excited for their new home, proud of what they've built, and looking forward to seeing it in person.

Build the card in three passes
Write the message. Keep the wording exact, including names, punctuation, and the sign-off. Read it aloud once. Spoken phrasing exposes awkward lines that look fine on a screen.
Choose the visual. Use a personal photo, a clean illustration, or AI-generated artwork that matches the occasion. Don't force a busy image behind a long message. The cover should attract attention, while the inside should remain easy to read.
Approve the finished preview. Check the front, inside, back, recipient details, and final total at print scale. A preview-before-payment step gives you a clear point to catch a misspelled name, an unsuitable crop, or wording that changed during editing.
Message text should be typeset separately from generated artwork. That preserves the exact approved wording and avoids the legibility problems that appear when AI-rendered text is baked into an image. For practical ideas on combining a personal message with a physical card, see this guide to creating and sending greeting cards.
The approval habit matters even when you're mailing the card yourself. Lay the card, envelope, and address information on the table together before sealing anything. If a service handles production, don't treat an order confirmation as permission to skip the final inspection. Approve only when the design, words, recipient, and destination all match what you intended.
Getting the Envelope and Address Right
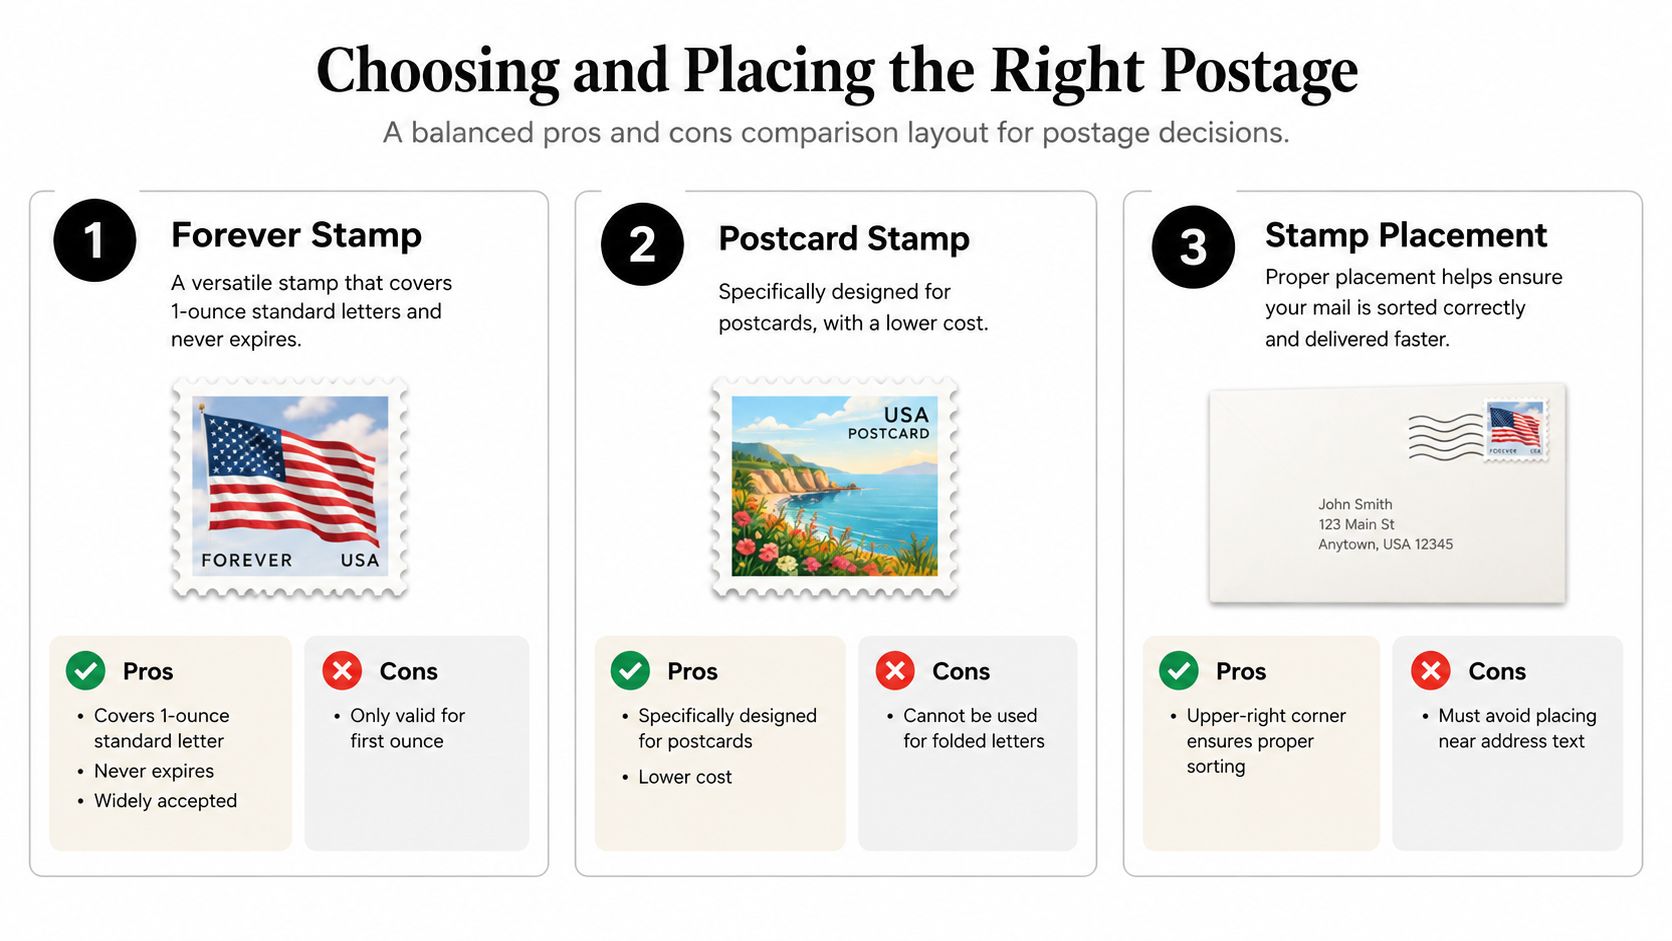
The envelope is a delivery document, not decoration. Put the recipient's delivery address on the front, on the side that carries the postage. Write the recipient's name first, the street address or applicable PO Box information next, and the city, state, and ZIP Code on the final line. Include the apartment, suite, directional, or rural-route details exactly where they belong.
USPS addressing standards also call for a return address. Place it in the upper-left corner so undeliverable mail has a practical route back to you. Keep the address block independent from the artwork. A beautiful background, low-contrast ink, or handwritten text crossing a decorative border can make a valid address harder for postal equipment and people to process.
Use a clean address zone
For a standard letter-size card, USPS recommends placing the address in the optical-character-reader area, 1/2 inch from both the left and right edges and between 5/8 inch and 2 3/4 inches from the bottom edge, according to its addressing standards for mailpieces. USPS also recommends 10-, 12-, or 14-point type for readability.
Keep these checks in your routine:
- Confirm the full destination: Match the city, two-letter state abbreviation, and ZIP Code. Use ZIP+4 when known because it gives more precise routing information.
- Check unit details: Missing apartment numbers and incorrect directional abbreviations are common reasons an otherwise neat address fails.
- Protect the machine-readable area: Leave barcode space clear unless a properly generated barcode is being applied.
- Keep contrast high: Dark, readable text on a plain background is safer than reverse printing, pale ink, or artwork behind the address.
- Reserve postage space: The upper-right corner needs room for the stamp, postmarks, and postal endorsements.
If you're handwriting the envelope, copy the address from a current source rather than memory. If a fulfillment partner prints it, inspect the rendered address in the final preview. The same greeting-card addressing guidance applies either way: accurate source data and a clean typeset block beat decorative improvisation.
Choosing and Placing the Right Postage
A card can be ready for the mailbox and still fail the postal-fit test. A standard letter weighing 1 ounce or less generally fits the ordinary letter category, but custom inserts and unusual construction can change the postage required. Do not assume a Forever Stamp covers every folded card.
A postcard uses a separate stamp category. A folded card inside an envelope is not a postcard just because it has a picture on the front. Square, oversized, rigid, unusually thick, or heavily decorated mail can require different postage or handling.
Run a postal-fit check
Before sealing the envelope, check the completed package:
- Measure the sealed envelope. The card's dimensions do not determine the mailpiece size by themselves.
- Weigh every insert together. Include photographs, extra panels, thick paper, and loose enclosures.
- Check flexibility. The envelope should bend normally. Rigid contents can affect processing.
- Inspect the outside. Raised decorations, uneven surfaces, and bulky add-ons may interfere with automated handling.
- Ask USPS when uncertain. A Post Office clerk can confirm the required postage before you send it.
Use a concrete test. A card with a glued photo insert typically moves from 1 ounce toward 2 ounces, which can change its price category. Weigh the sealed envelope before assuming one Forever Stamp is enough. A polished digital preview says nothing about the final package's weight, thickness, or flexibility.
If the sealed envelope feels noticeably heavier, thicker, or stiffer than an ordinary letter, verify it instead of guessing. That quick check prevents returned mail, delays, and an awkward request for extra postage.
A fulfillment service can bundle the card, envelope, and domestic postage into one displayed total. The sender still needs to confirm the destination and approve the final preview. The service handles postage selection as part of fulfillment, while the sender remains responsible for approving what enters the mail stream.
Working Backward to a Realistic Send-By Date
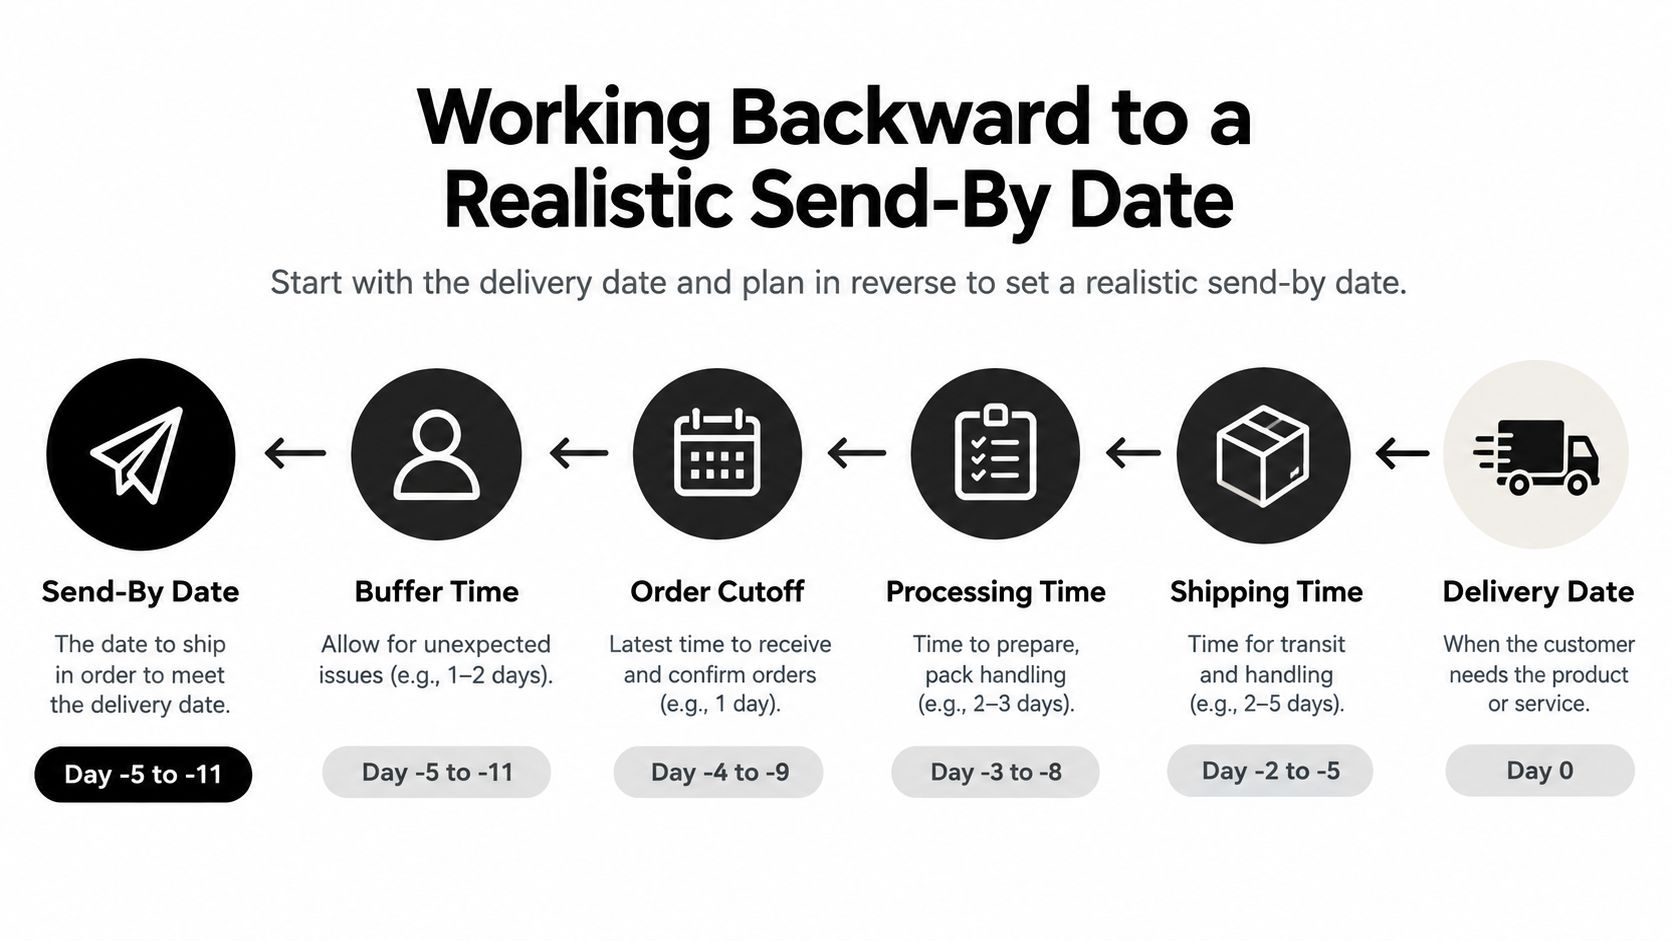
“Mail it early” is friendly advice, but it doesn't give you a date. Work backward from the occasion instead. First mark the day the card should arrive, then allow time for your own approval, production and fulfillment if someone else is printing it, USPS transit, and a final buffer.
USPS describes First-Class Mail delivery as an estimated window, not a guaranteed arrival date. Its FY2025 Q4 report recorded 86.3% on-time performance for single-piece First-Class Mail with a two-day standard and 78.9% for the three-to-five-day standard. At least 98.1% of mail across all standards arrived within the applicable standard plus three days, according to the USPS FY2025 Q4 service performance report.
Separate approval from acceptance
For a homemade card, approval means finishing the message and address. For a printed service, approval is the moment you authorize production. Production completion still isn't USPS acceptance. The card becomes part of the postal journey after the fulfillment provider hands it to USPS.
Use this working-backward sequence:
- Occasion: Mark the birthday, holiday, anniversary, thank-you moment, or apology date.
- Approval: Finish the message, image, recipient, and final preview before production begins.
- Fulfillment: Allow time for printing, assembly, addressing, and quality checks when a provider handles the card.
- Postal transit: Add the applicable First-Class Mail service window.
- Buffer: Add room for weekends, postal holidays, weather, address corrections, and local variation.
For a domestic card, I recommend allowing roughly five to seven business days from final approval to the intended occasion when production is involved, with more time for important dates. That's a planning recommendation, not a USPS guarantee. If the date is emotionally important, send earlier rather than trying to optimize for the last possible mailing day.
Record the approval time, production handoff, mailing date, destination ZIP Code, and any returned-mail event. This simple log separates “I paid for the card” from “the card entered the postal network,” which are different milestones.
Mailing It Yourself or Letting a Service Handle It
DIY mailing works well when you have the finished card, a verified address, and time to check postage. Put the outgoing envelope in a residential mailbox, a blue collection box, or take it to a Post Office. Use the counter when the card is unusual and you want someone to assess its physical fit.
A fulfillment service suits a different situation. You provide the wording and artwork, inspect the final preview, confirm the destination, and approve production. The provider then prints, packs, addresses, and hands off the card. Mail This uses Cardly for that fulfillment path, offers a fixed $9.99 price including the card, envelope, and domestic postage, and supports eligible U.S. states and Washington, D.C. Its current coverage excludes New York State, U.S. territories, and military addresses, so check eligibility before planning around it.
| Step | DIY Mailing | Mail This + Cardly |
|---|---|---|
| Create the card | Write, print, or buy it yourself | Choose or create the artwork and message |
| Verify the destination | Check the address before sealing | Confirm the recipient and address during preview |
| Prepare postage | Select the category and apply the stamp | Domestic postage is included in the displayed price |
| Final quality check | Inspect the card and envelope at home or the Post Office | Review the full card, destination, and total before payment |
| Postal handoff | Use a mailbox, collection box, or Post Office | Cardly prints, packs, addresses, and hands it to USPS |
| Best fit | You want control and already have the materials | You want one approval flow instead of managing physical steps |
The service route doesn't make a guaranteed arrival date available. It also can't solve an unsupported destination or an address you approve incorrectly. If you want the approval-first route, start with sending a personalized card through Mail This, then treat the preview as your final production proof.
A Simple Send Checklist You Can Reuse
Keep this checklist beside your calendar:
- Preview the card: Read the message, inspect the image, and confirm names and sign-off.
- Confirm the address: Check the street or PO Box, unit details, city, state, and ZIP Code. Add ZIP+4 when known.
- Verify postal fit: Decide whether the sealed card is a standard letter, postcard, or something that needs a postage check.
- Place postage correctly: Put the stamp in the upper-right corner of the address side and keep the address area clear.
- Choose a send-by date: Work backward from the occasion and leave a buffer after approval and handoff.
- Record the handoff: Note when you mailed it or when the fulfillment provider passed it to USPS.
The most useful habit is approval before commitment. Don't let a rushed birthday, a generated image, or an autofilled address move straight from idea to postage. Check the finished card once, then send it with confidence. A physical card that arrives a little early still beats a late text for the occasions that matter.
Mail This turns your message and artwork into a personalized folded card, then provides a full preview before payment while handling printing, addressing, and domestic postage through Cardly. Visit Mail This to create and approve your card before it enters the mail.